
Lost in the Inky Darkness

Today's card features a few of the new Tim Holtz Sizzix and Ranger Halloween products.  I could not wait to use the Tim Holtz Skulls 3-D Texture Fades embossing folder and combine it with Distress inks and spray stains.


I started by inking the flat side of the embossing folder with Black Soot Distress Archival Ink.  I sprayed a panel of water color paper with water and carefully placed this paper into the embossing folder. I ran the embossing folder through my Sizzix Big Shot 3 times. I took the embossed panel out of the embossing folder and cleaned the embossing folder with StazOn All-Purpose Stamp Cleaner.

Next, I sprayed the panel with Tim Holtz Decayed Distress Mica Stain.  This gave it a green tinge with a hint of sparkle.  I decided to seal the card panel by dipping a foam blending pad into Distress Micro Glaze and dabbing this onto the card panel.  I glued a black cardstock matte behind the embossed panel and adhered it to a white card base.


For the sentiment, I used the "Lost in the Inky Darkness" stamp from one of the Tim Holtz stamp and stencil sets.  I inked the stamp with VersaMark ink and stamped it onto black cardstock.  I heat embossed it with Ranger Bubbly embossing powder which matched the color of the Decayed Mica Stain.  I die cut the sentiment using the banner die from the Tim Holtz Halloween 2021 Vault Series. I folded in the edges of the banner and adhered it to the bottom of the card using black foam tape.


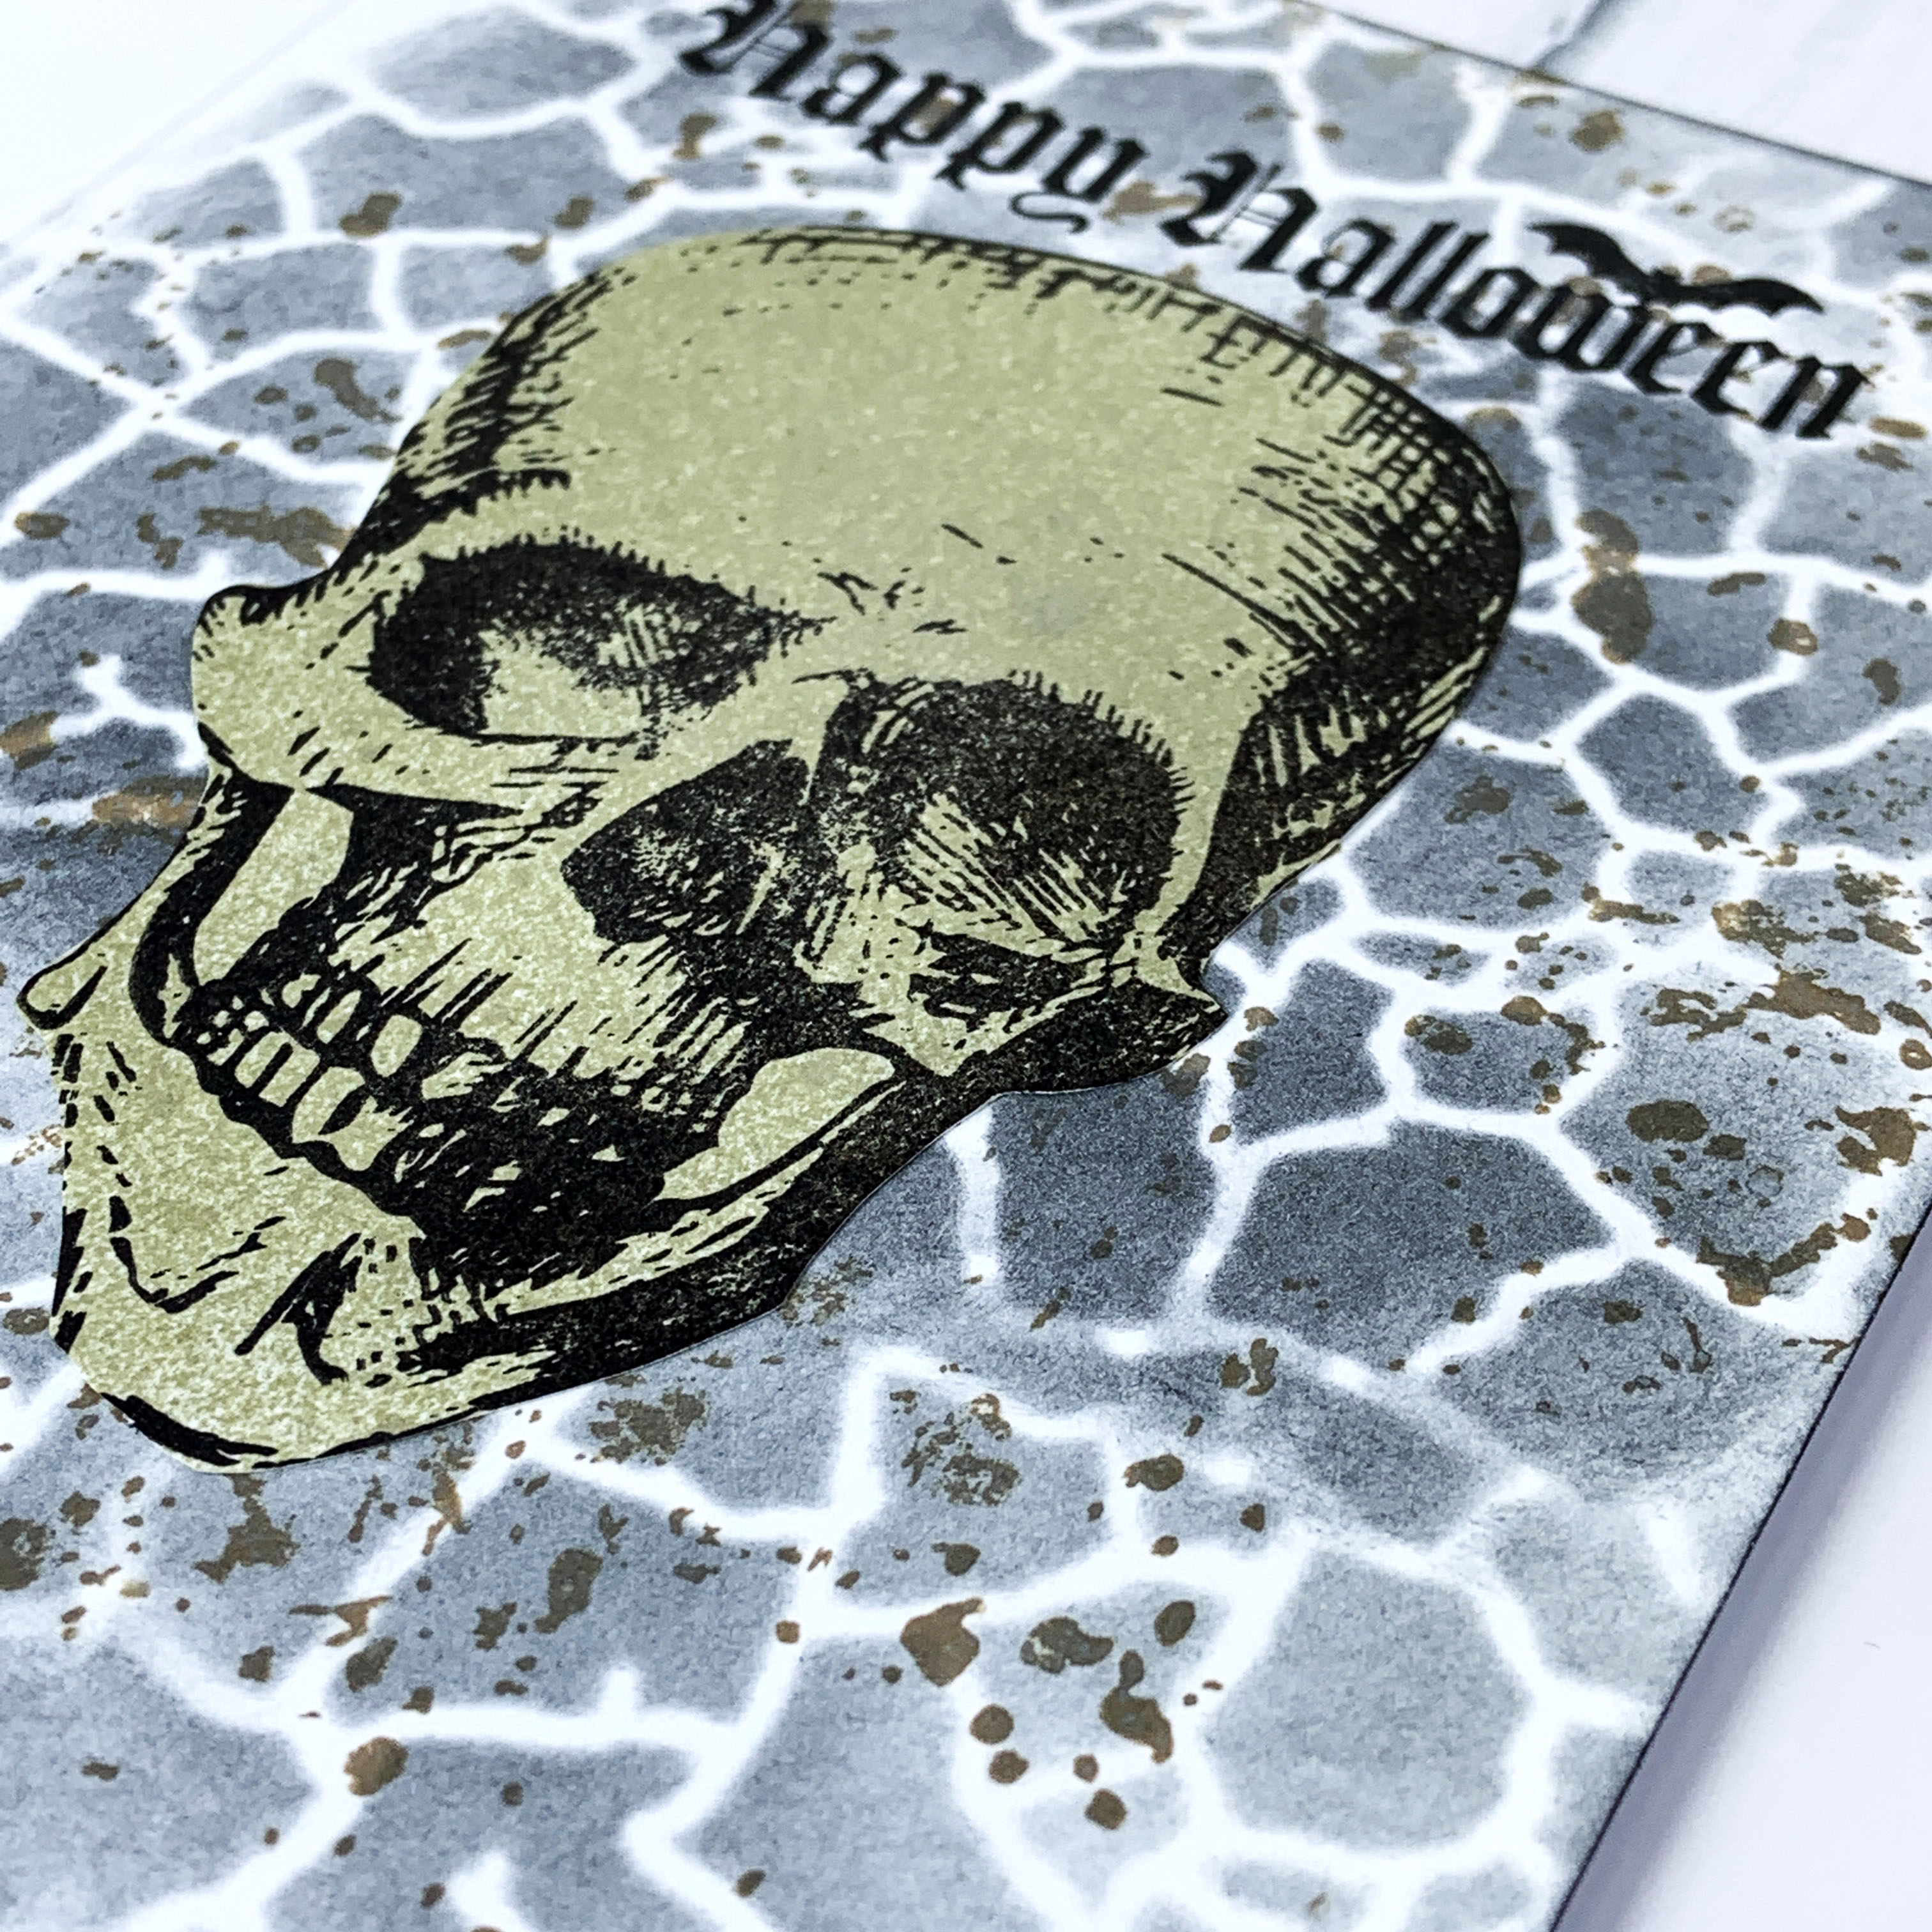
I wanted to add some pizazz to the inside of the card, so I used the shattered stencil from one of the Tim Holtz stamp and stencil sets.  I applied Frayed Burlap Distress Oxide Ink over the stencil using a foam blending tool.  Then, I used a splatter brush to splatter Decayed Mica Stain onto the inside of the card.  I stamped the skull onto white cardstock using Black Soot Archival ink.  I sprayed the paper with Decayed Mica Stain and fussy cut around the skull.  I adhered the skull to the center of the inside of the card.  Using the same black ink, I stamped "Happy Halloween" near the top of the card.


I absolutely love the detail of this embossing folder and can't wait to use it with other color combinations of Distress sprays, stains, and crayons.

Lost in the Inky Darkness
Supplies:
  • Accent Opaque White Cardstock 100lb
  • Recollections Cardstock - black and white
  • Watercolor Paper
  • Distress Archival Ink - Black Soot
  • Tim Holtz Sizzix 3-D Texture Fades Skulls Embossing Folder
  • StazOn All-Purpose Stamp Cleaner
  • Tim Holtz Ranger Distress Mica Stain - Decayed
  • Tim Holtz Ranger Distress Micro Glaze
  • Foam Blending Brush
  • VersaMark Ink
  • Ranger Embossing Powder - Bubbly
  • Tim Holtz Stampers Anonymous Halloween Stamp and Stencils Sets - 148 & 149
  • Tim Holtz Sizzix Halloween 2021 Vault Series
  • Splatter Brush
  • Recollections Halloween Wood Stamp - Happy Halloween

Comments

Popular posts from this blog

Ready Player One

Today's card is a fun virtual reality birthday card created in Cricut Design Space and features a vibrant title backed by an alcohol inked panel. A couple of years ago, my son and I read the book Ready Player One,  a science fiction book about humanity's use of virtual reality to escape the real world. Fast forward a few years and now he wants his own virtual reality headset for his birthday.  I created this card for him to celebrate our love for this book and to serve as a precursor of the birthday gift that was to come. While creating this card, I wore the movie T-Shirt I bought last year so I could mimic the movie title font and colors.  I needed an easy way to make the title out of rainbow colors so I placed a few colors of alcohol ink on a felt pad and swiped it across Yupo Paper.  I downloaded and installed the font used for the movie title and cut the title out of a black A2 card panel using Cricut Design Space.  I backed the black card panel with th...

Glimmer Hot Foil Birthday Cards

Today's cards are part of my stash-busting series.  This is where I look around my craft room and grab a bunch of supplies that I haven't yet had the chance to use.  The results yielded two glimmer hot foiled birthday cards. I used the smooshing technique to apply Mustard Seed and Worn Lipstick Distress Oxide inks onto white card panels.  After the panels were dry, I used the Spellbinders Glimmer Hot Foil System along with the Scattered Flowers and Diamonetta Background Glimmer plates to add Aura Glimmer Hot foil to the card panels.   The card panels were mounted onto pink cardstock.  I used the same Aura foil to glimmer the Happy Birthday sentiment onto white cardstock.   I cut the sentiment using a Momenta nesting border die.  I used a slightly larger border die to cut a sentiment border from the pink cardstock.  I cut pink and yellow flowers using the Sizzix Spring Things die set.  I ran the flowers and sentiment border through t...

Tim Holtz Spencer Halloween Card

I can't get enough of Tim Holtz's Colorize Spencer die set.  The detail and dimension of this image is absolutely amazing.  Today's card features Spencer, 3-D embossing folders, and a few other Tim Holtz Halloween dies sets. The main card panel was made by embossing a piece of silver foil cardstock using the Sizzix 3-D Textured Impressions Pinwheel embossing folder.  I watered down a few drops of black acrylic paint and used a paint brush to brush the paint onto the embossed panel.  I let the paint dry for about a minute and then took a paper towel to rub off the excess paint.  I adhered this panel to a black card base. The smaller card panel was made by embossing a piece of black cardstock with the Tim Holtz Sizzix 3-D Texture Fades Mini Cobblestone embossing folder.  I added a few drops of Sterling Distress Foundry Wax to a craft mat and used my finger to apply the Foundry Wax to the embossed panel.  I added a black matte behind this emboss...