
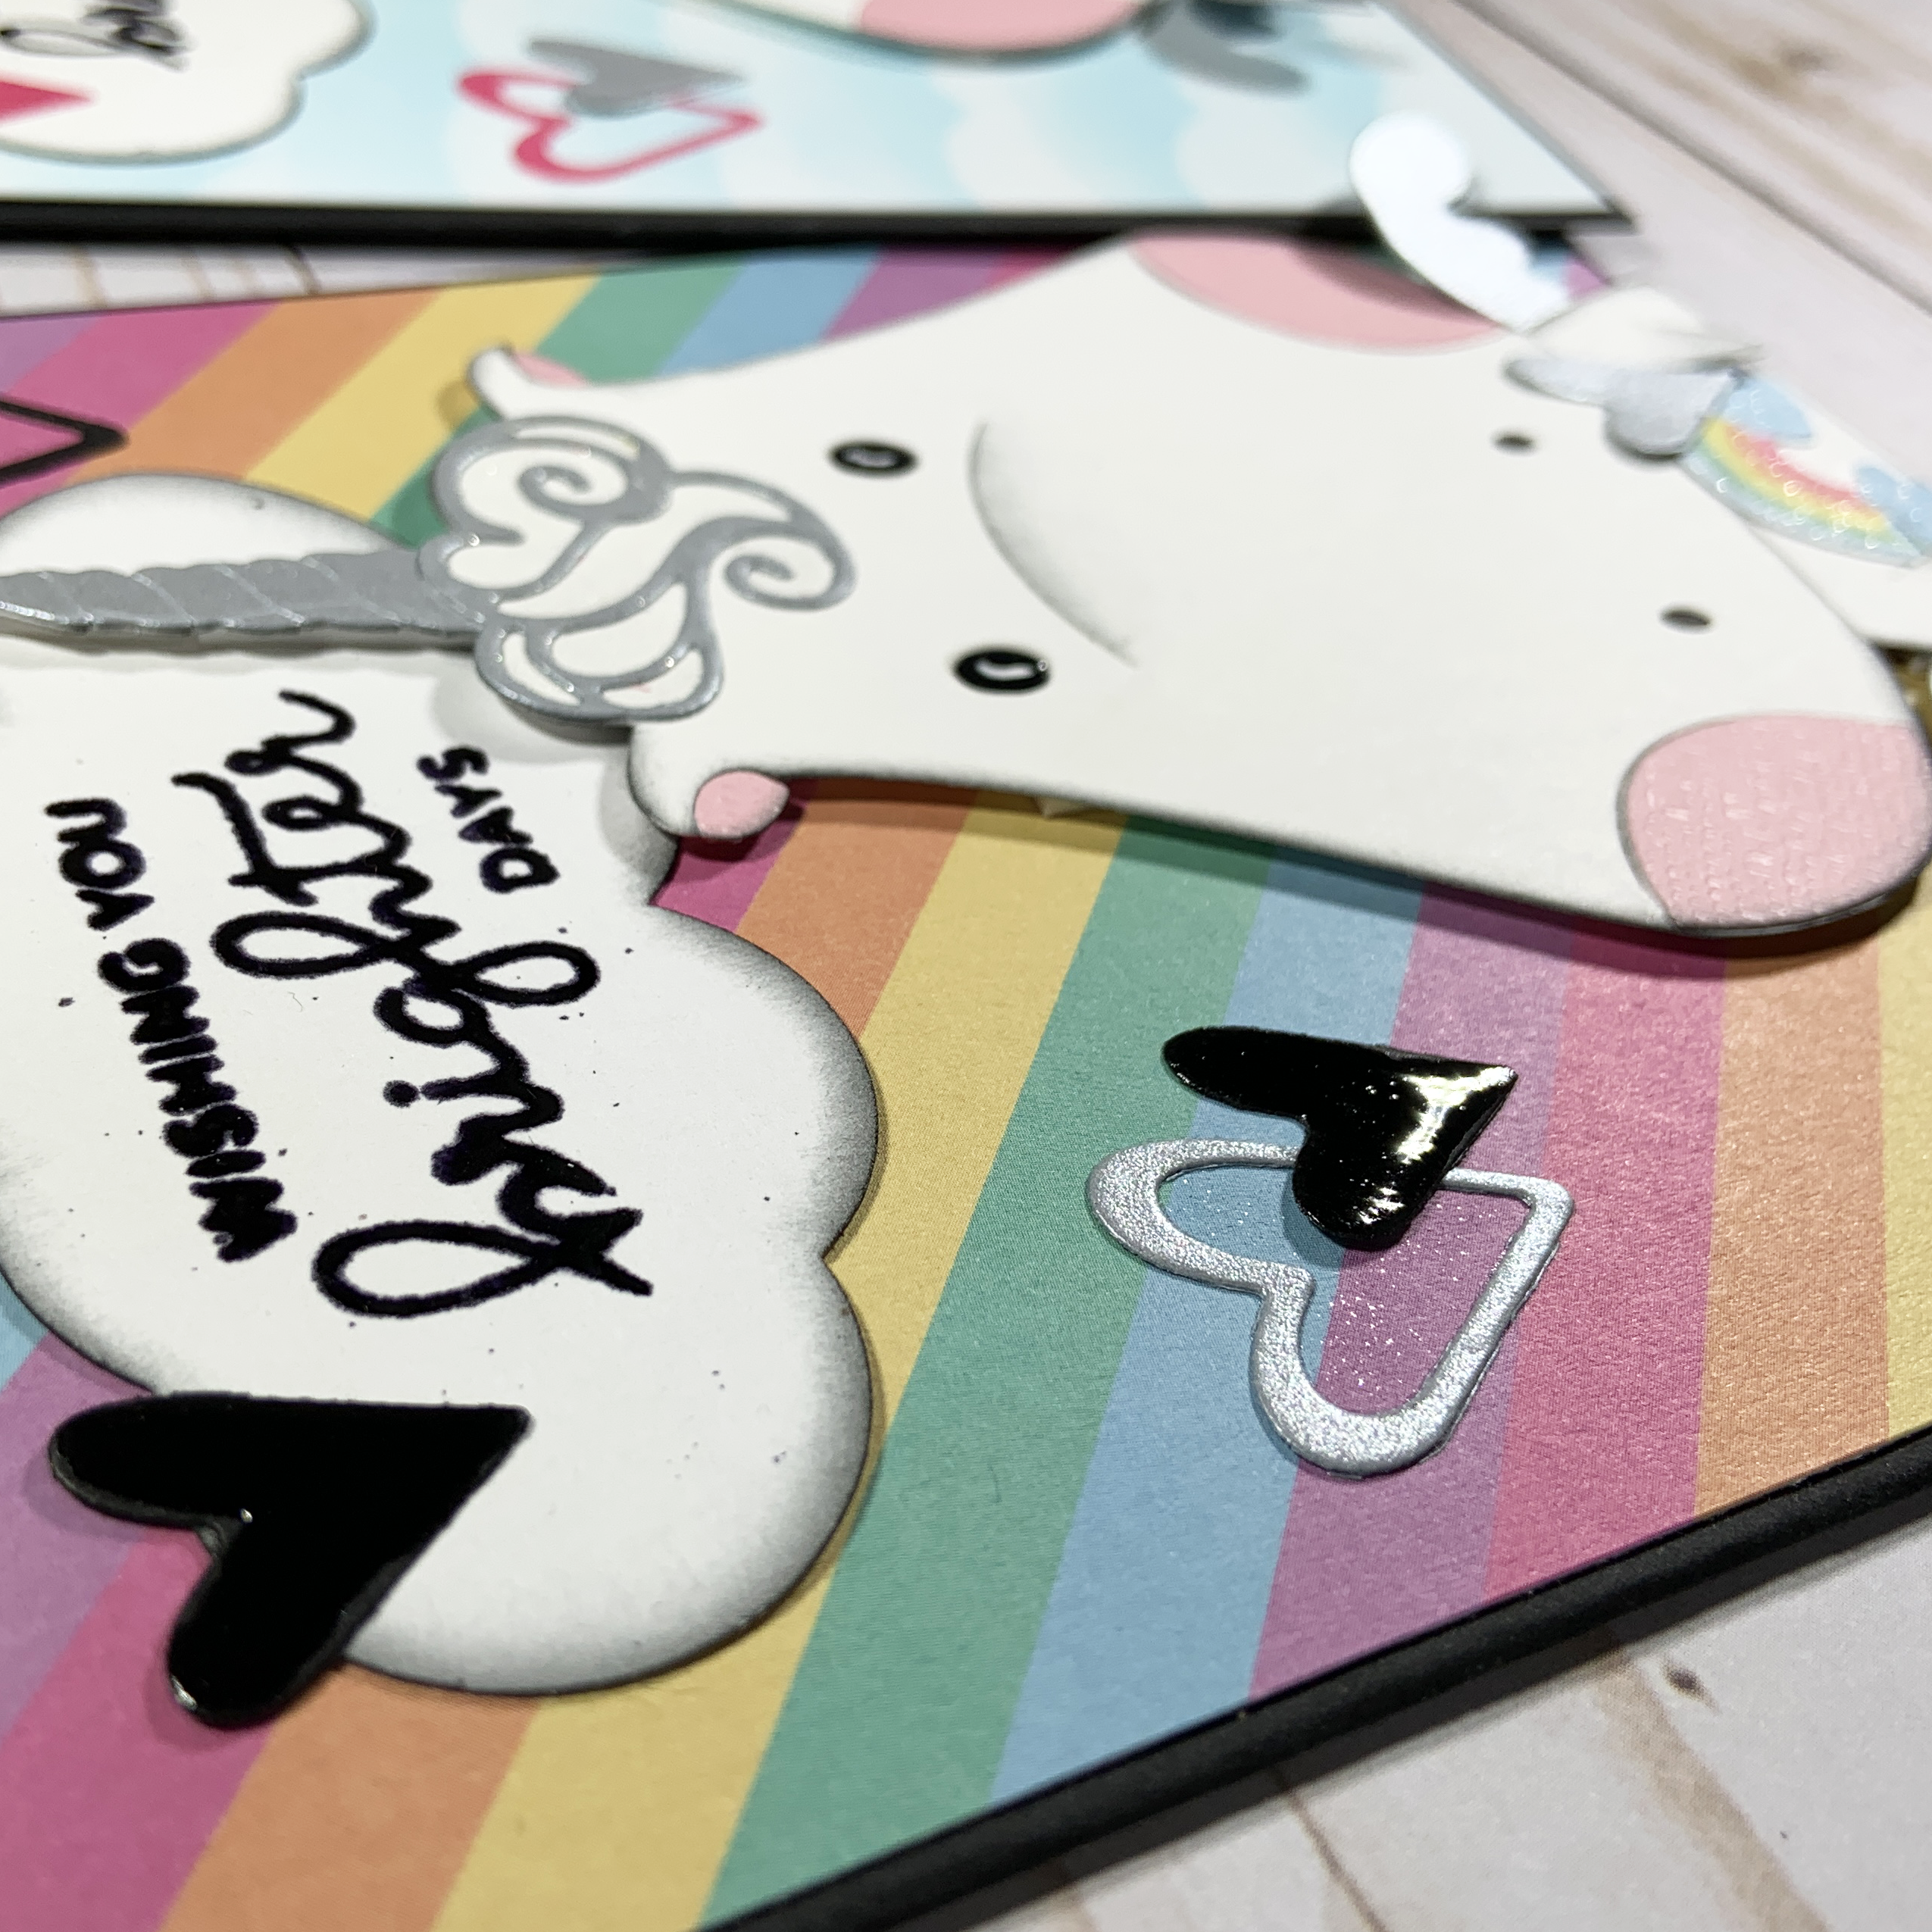
Today's card is another unicorn card featuring the Waffle Flower Be a Unicorn die. I absolutely love the large unicorn die. It has such a sweet face and it is cut so that the unicorn is able to hold something in its hooves. I used silver cardstock for the unicorn's horn and wings and pink cardstock for the cheeks and ears. I glued a thin strip of black cardstock behind the eyes and nostrils. The edges of the unicorn were inked with Black Soot Distress Ink. I had a few scraps of pastel-colored cardstock from my previous unicorn card so for some of the unicorns, I used the different colors of cardstock for the unicorn's mane. 


For the featured card, I used a card panel cut from a diagonal rainbow striped paper from a paper pad I picked up from Michaels last year called Stay Magical. I had several clouds that already had sentiments embossed in black leftover from my previous unicorn card, so I decided to use them up on these cards as well. The edges of the clouds were also inked with Black Soot Distress Ink. For the card panels of the other cards, I experimented with different cloud stencils and inked some clouds onto Bristol Smooth cardstock using Tumbled Glass Distress Oxide Ink.

I wanted the unicorn to be holding a rainbow in its hooves. I was able to fussy cut a couple of different rainbows from pieces of paper in the Stay Magical paper pad as well as the Shimelle Glitter Girl Project Pad. The rainbow was placed between the hooves and I used a small piece of foam tape behind the top of the rainbow to keep it in place and give it a bit of dimension.

To assemble the card, I mounted the cloud card panel to a black card base. I glued the cloud near the top of the panel and adhered the unicorn using foam tape. To embellish the card, I used the hearts from the Jane Davenport You Are Unique Die Set. I also tucked one of the solid hearts into the unicorn's hooves near the base of the rainbow. The last step was to give the card a little sparkle and shine. I used a Wink of Stella clear glitter brush marker to add sparkle to the unicorn's mane and cheeks and to some of the hearts. I added Nuvo Crystal Glaze to the unicorn's eyes and to the solid hearts. Once the glaze dried, I used a white gel pen to add some highlights to the unicorn's eyes.
This card is so adorable and I am so glad I made extras because I just might have to keep one for myself!
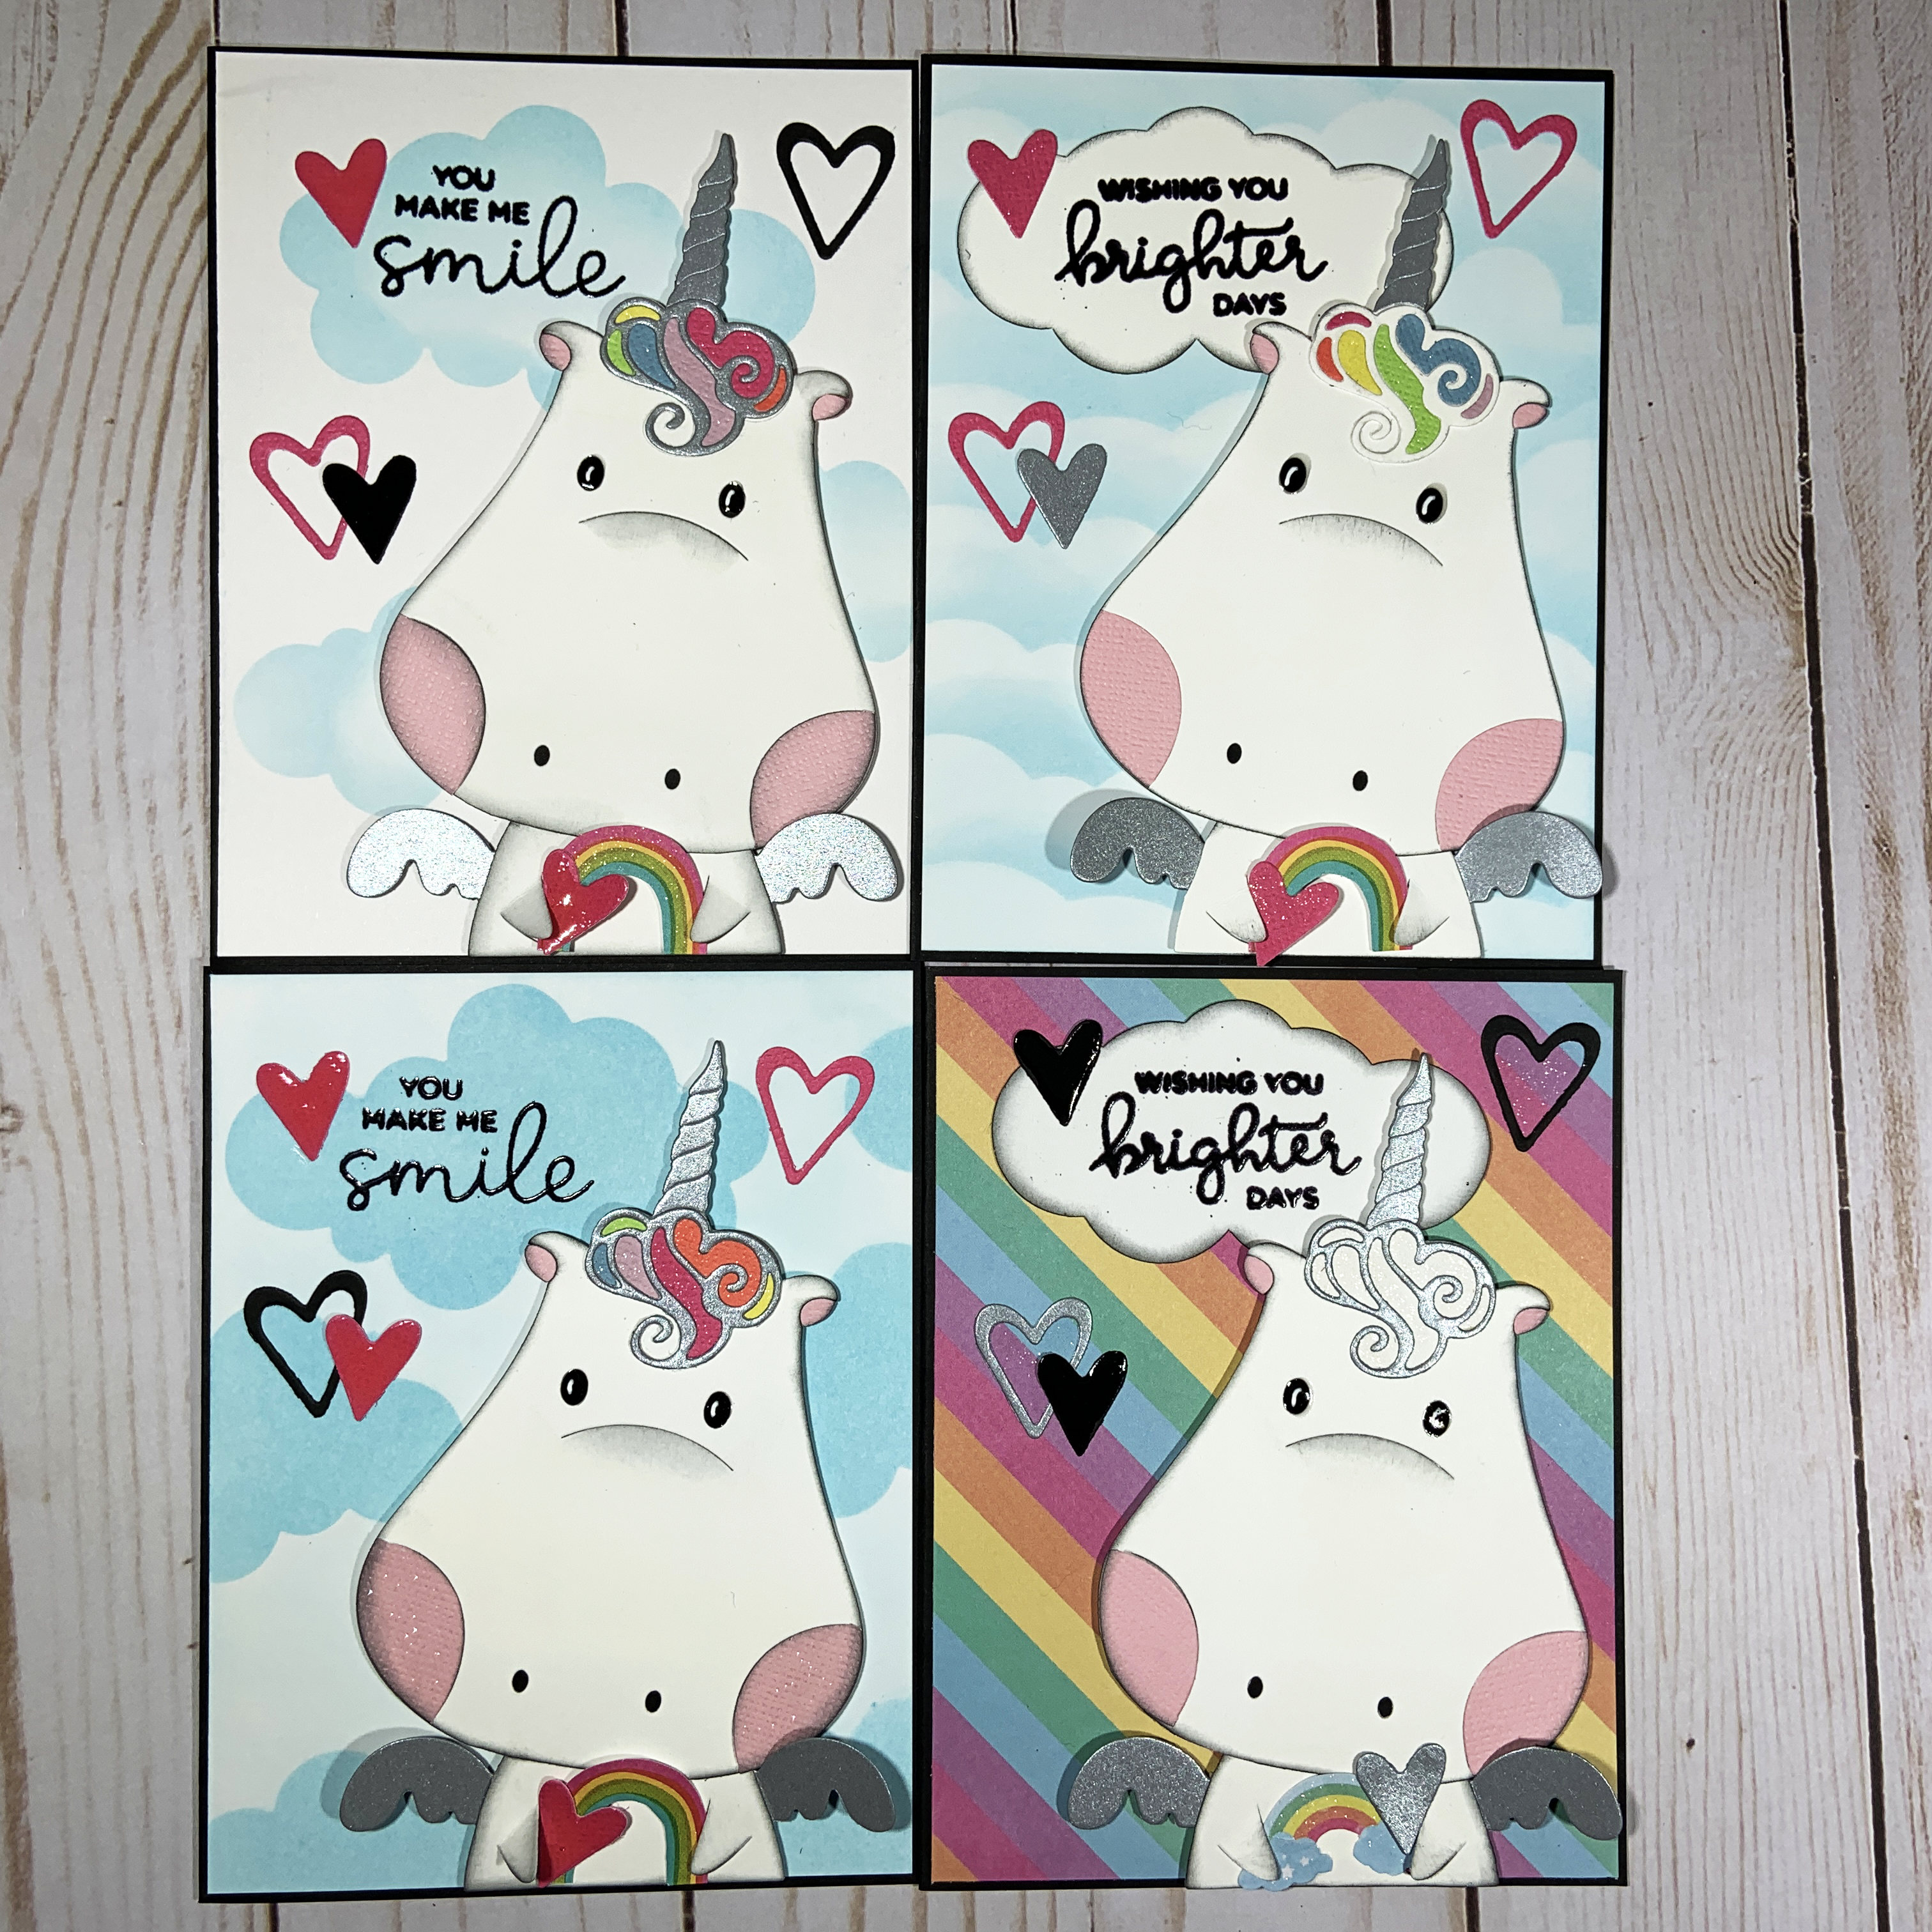
Wishing You Brighter Days
Supplies:
- Waffle Flower Be A Unicorn Die
- Cardstock- silver, white, and black
- Hampton Art KI 6x6 Pastel Cardstock Paper Pad
- Tim Holtz Distress Ink - Black Soot
- Cricut - Rainbow and Cloud (#MA78E9BB)
- Memento Tuxedo Black Ink
- Hello Bluebird Rainbow Script Stamp Set
- VersaMark Ink
- Recollections Embossing Powder - Ebony
- Strathmore Bristol Smooth Cardstock
- Tim Holtz Distress Oxide Ink - Tumbled Glass
- My Favorite Things Cloud Stencil
Craft Smith Stay Magical Paper Pad
Shimelle Glitter Girl Project Pad
Jane Davenport You Are Unique Die Set
Nuvo Crystal Glaze
- Wink of Stella Clear Glitter Brush Tip Marker
- White Gel Pen
Comments
Post a Comment