
Winter Wishes

I finally received my Spellbinders Small Die of the Month November 2020 die cut set and could not wait to use it to create some winter cards. I also recently purchased the Sizzix 3-D Jeweled Snowflakes embossing folder and wanted to pair this with the die set. 
To begin, I cut a card panel out of white cardstock. I inked the smooth side of the embossing folder with Tumbled Glass Distress Oxide Ink. I lightly sprayed the embossing folder and the paper with a small amount of water and ran it through my Big Shot machine. Next, I cut two hillsides using the Lawn Fawn Stitched Hillside Border die set. Using a blending brush, I inked the top edges of the hillsides with Tumbled Glass Distress Oxide Ink. I adhered the hillsides to the bottom of the card panel, popping up the top hillside with foam tape. I splattered the entire card panel and snowbanks with a mixture of Perfect Pearls and water.  
The tree limbs were cut from a piece of white cardstock that I brayered with Shabby Shutters and Peeled Paint Distress Oxide Inks.  I cut the tree trunk from light brown cardstock and glued the tree limbs to the tree trunk. A small strip of foam tape was placed behind the tree trunk and adhered behind one of the stitched hillsides. I assembled the snowman and added a few striped details to its scarf and gloves using a gray fine felt tip marker. I stamped the sentiment “Winter Wishes” with VersaMark ink and embossed it with silver embossing powder. I mounted the sentiment on light pink cardstock and glued it to the card panel. The card panel was adhered to a white card base.
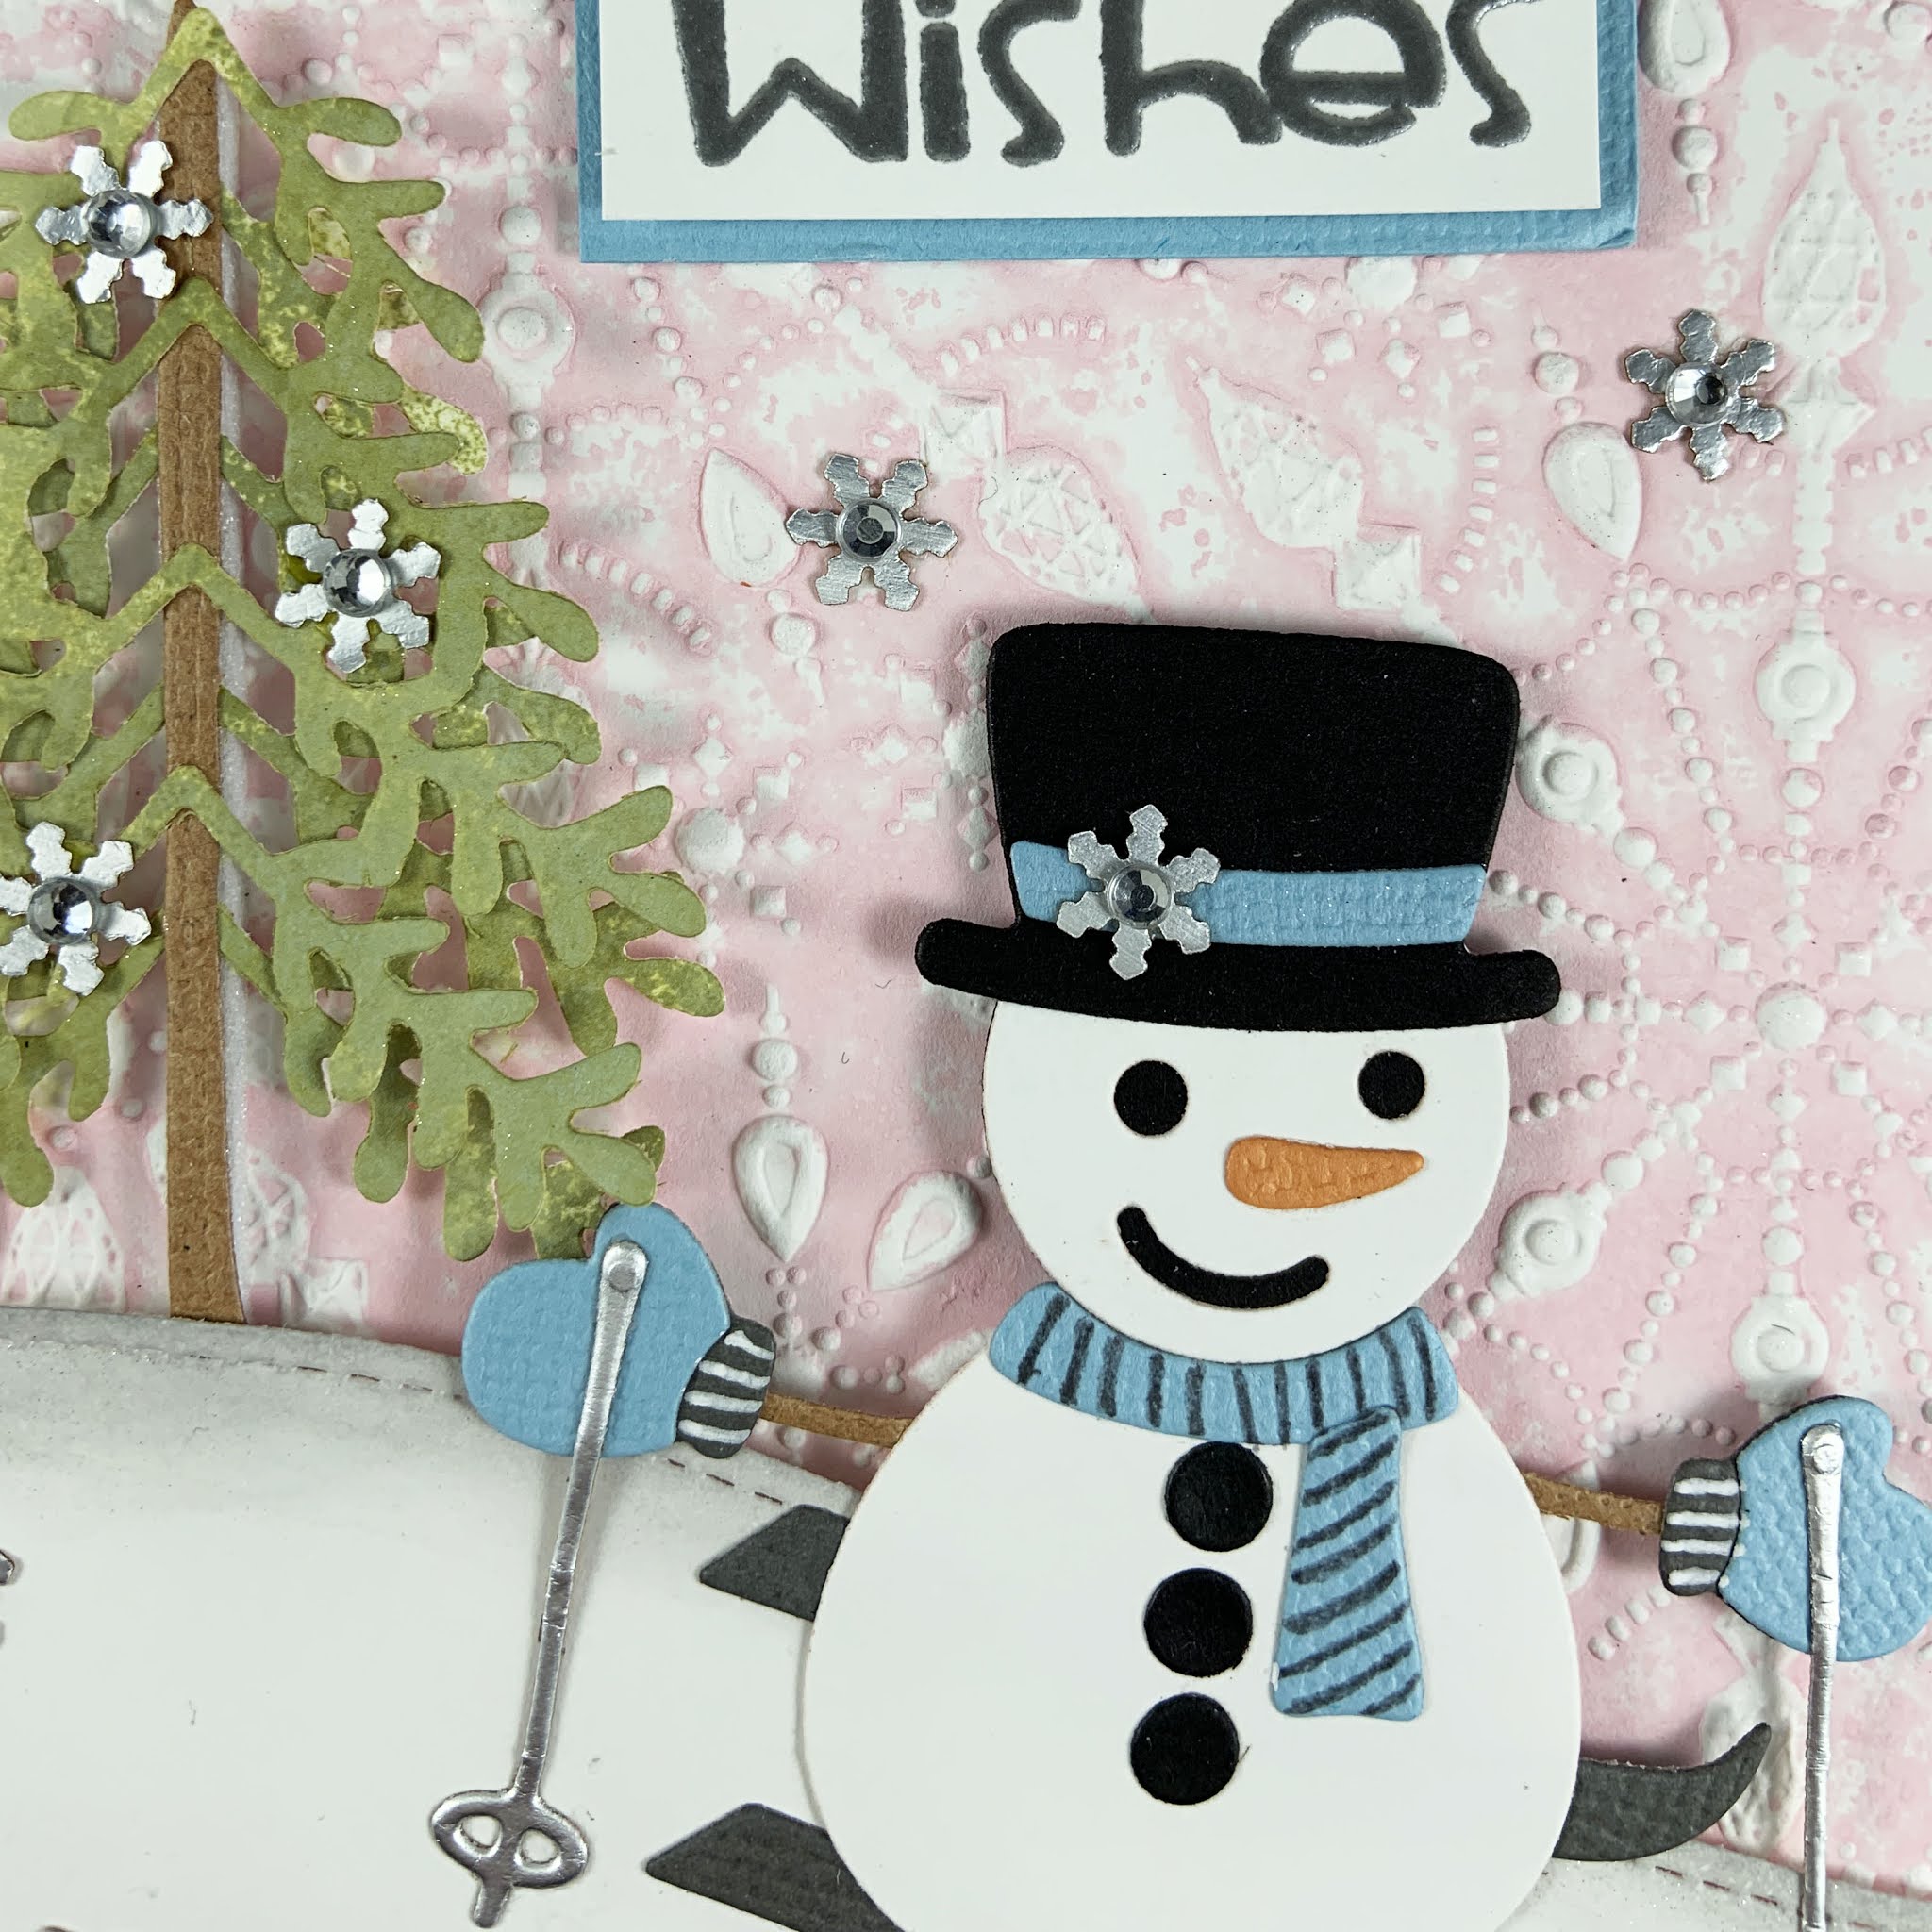
The second card was made in a similar manner except I inked the 3-D embossing folder with Spun Sugar Distress Oxide Ink to emboss the white background panel. I inked the edge of the hillside border with Hickory Smoke Distress Oxide Ink and brushed Wink of Stella over the edge of the hillside and on the snowflakes of the background panel.  The snowman was assembled and glued to the bottom of the hillside. I punched out several small snowflakes out of silver foil cardstock and scattered them around the scene.  I added a small rhinestone to the center of each snowflake.


Winter Wishes
Supplies:
  • Recollections Cardstock - White, Black, Silver Foil
  • Assorted Cardstocks - Light Blue, Pink, Gray, Orange, Light Brown
  • Sizzix 3-D Textured Impressions Jeweled Snowflakes Embossing Folder
  • Lawn Fawn Lawn Cuts Stitched Hillside Borders
  • The Stamps of Life Penguin2Stamp
  • Spellbinders Small Die of the Month November 2020 Frankie Goes to the North Pole
  • Distress Oxide Inks - Spun Sugar, Tumbled Glass, Peeled Paint, Shabby Shutters, and Hickory Smoke
  • Versamark Ink
  • Zing Silver Embossing Powder
  • Ranger Perfect Pearls
  • ZIG Wink of Stella Glitter Brush Marker Pen - Clear
  • Family Treasures Tiny Snowflake Punch
  • Want to Scrap Small Silver Bling
  • Darice Double-Sided Adhesive Foam Strips
  • American Crafts Detailed Doodlers Gray Fine Tipped Felt Marker


Comments

Popular posts from this blog

Tim Holtz Spencer Halloween Card

I can't get enough of Tim Holtz's Colorize Spencer die set.  The detail and dimension of this image is absolutely amazing.  Today's card features Spencer, 3-D embossing folders, and a few other Tim Holtz Halloween dies sets. The main card panel was made by embossing a piece of silver foil cardstock using the Sizzix 3-D Textured Impressions Pinwheel embossing folder.  I watered down a few drops of black acrylic paint and used a paint brush to brush the paint onto the embossed panel.  I let the paint dry for about a minute and then took a paper towel to rub off the excess paint.  I adhered this panel to a black card base. The smaller card panel was made by embossing a piece of black cardstock with the Tim Holtz Sizzix 3-D Texture Fades Mini Cobblestone embossing folder.  I added a few drops of Sterling Distress Foundry Wax to a craft mat and used my finger to apply the Foundry Wax to the embossed panel.  I added a black matte behind this emboss...

I'd Cross the Ocean For You

I just received the Seas the Day stamp set by Dare 2B Artzy and I couldn't wait to use the images and sentiments to make some ocean-themed cards.   I started out by stamping the manatee and shells and colored them with Copic markers.  For the card front, I used Pixie Spray on the back of a mermaid scales stencil and adhered it to a piece of Bristol smooth cardstock.  I blended 3 colors of blue Distress Oxide Inks to make it look like the ocean water was getting lighter near the surface.  To add a little bit of sparkle to the water, I splattered some glitter ink on the stenciled card front. I decided to make this a shaker card, so I used a scallop square die to cut a window out of the center of the card front.  A piece of acetate was glued to the back of this window.  I blended Tumbled Glass Distress Oxide Ink on the white card base.  A sequence mixture was made using blue, white, and iridescent sequence.  I glued a few of the sequence pieces ...

Hello Spring 2022

I love making spring cards.  I get so excited to mix and match the many die sets I have accumulated throughout the year.  Today's cards feature die cut shapes from a variety of die sets.  I created both a vertical and horizontal card layout, changing out the focal image on each of the cards. I started by cutting one of the Sizzix Creative Background dies from the side of a white card panel.  I trimmed a little off each edge and layered it onto a pink cardstock panel.  I cut some grass from light green cardstock using the the grass die from the Spellbinders March 2021 Large Die of the Month Set.  Using the same die set, I cut the sentiment "Hello Spring" from lavender cardstock. You can't have a spring card without lots of flowers, so I scavenged through my scraps of paper to find colors that would coordinate well together.  I used multiple Sizzix Thinlits die sets to cut flowers, foliage, and branches from the scraps of colored cardstock.  I also ...