
Luv U More

Today's Valentine shaker card features the Spellbinders Snarky Hearts Glimmer Plates.  


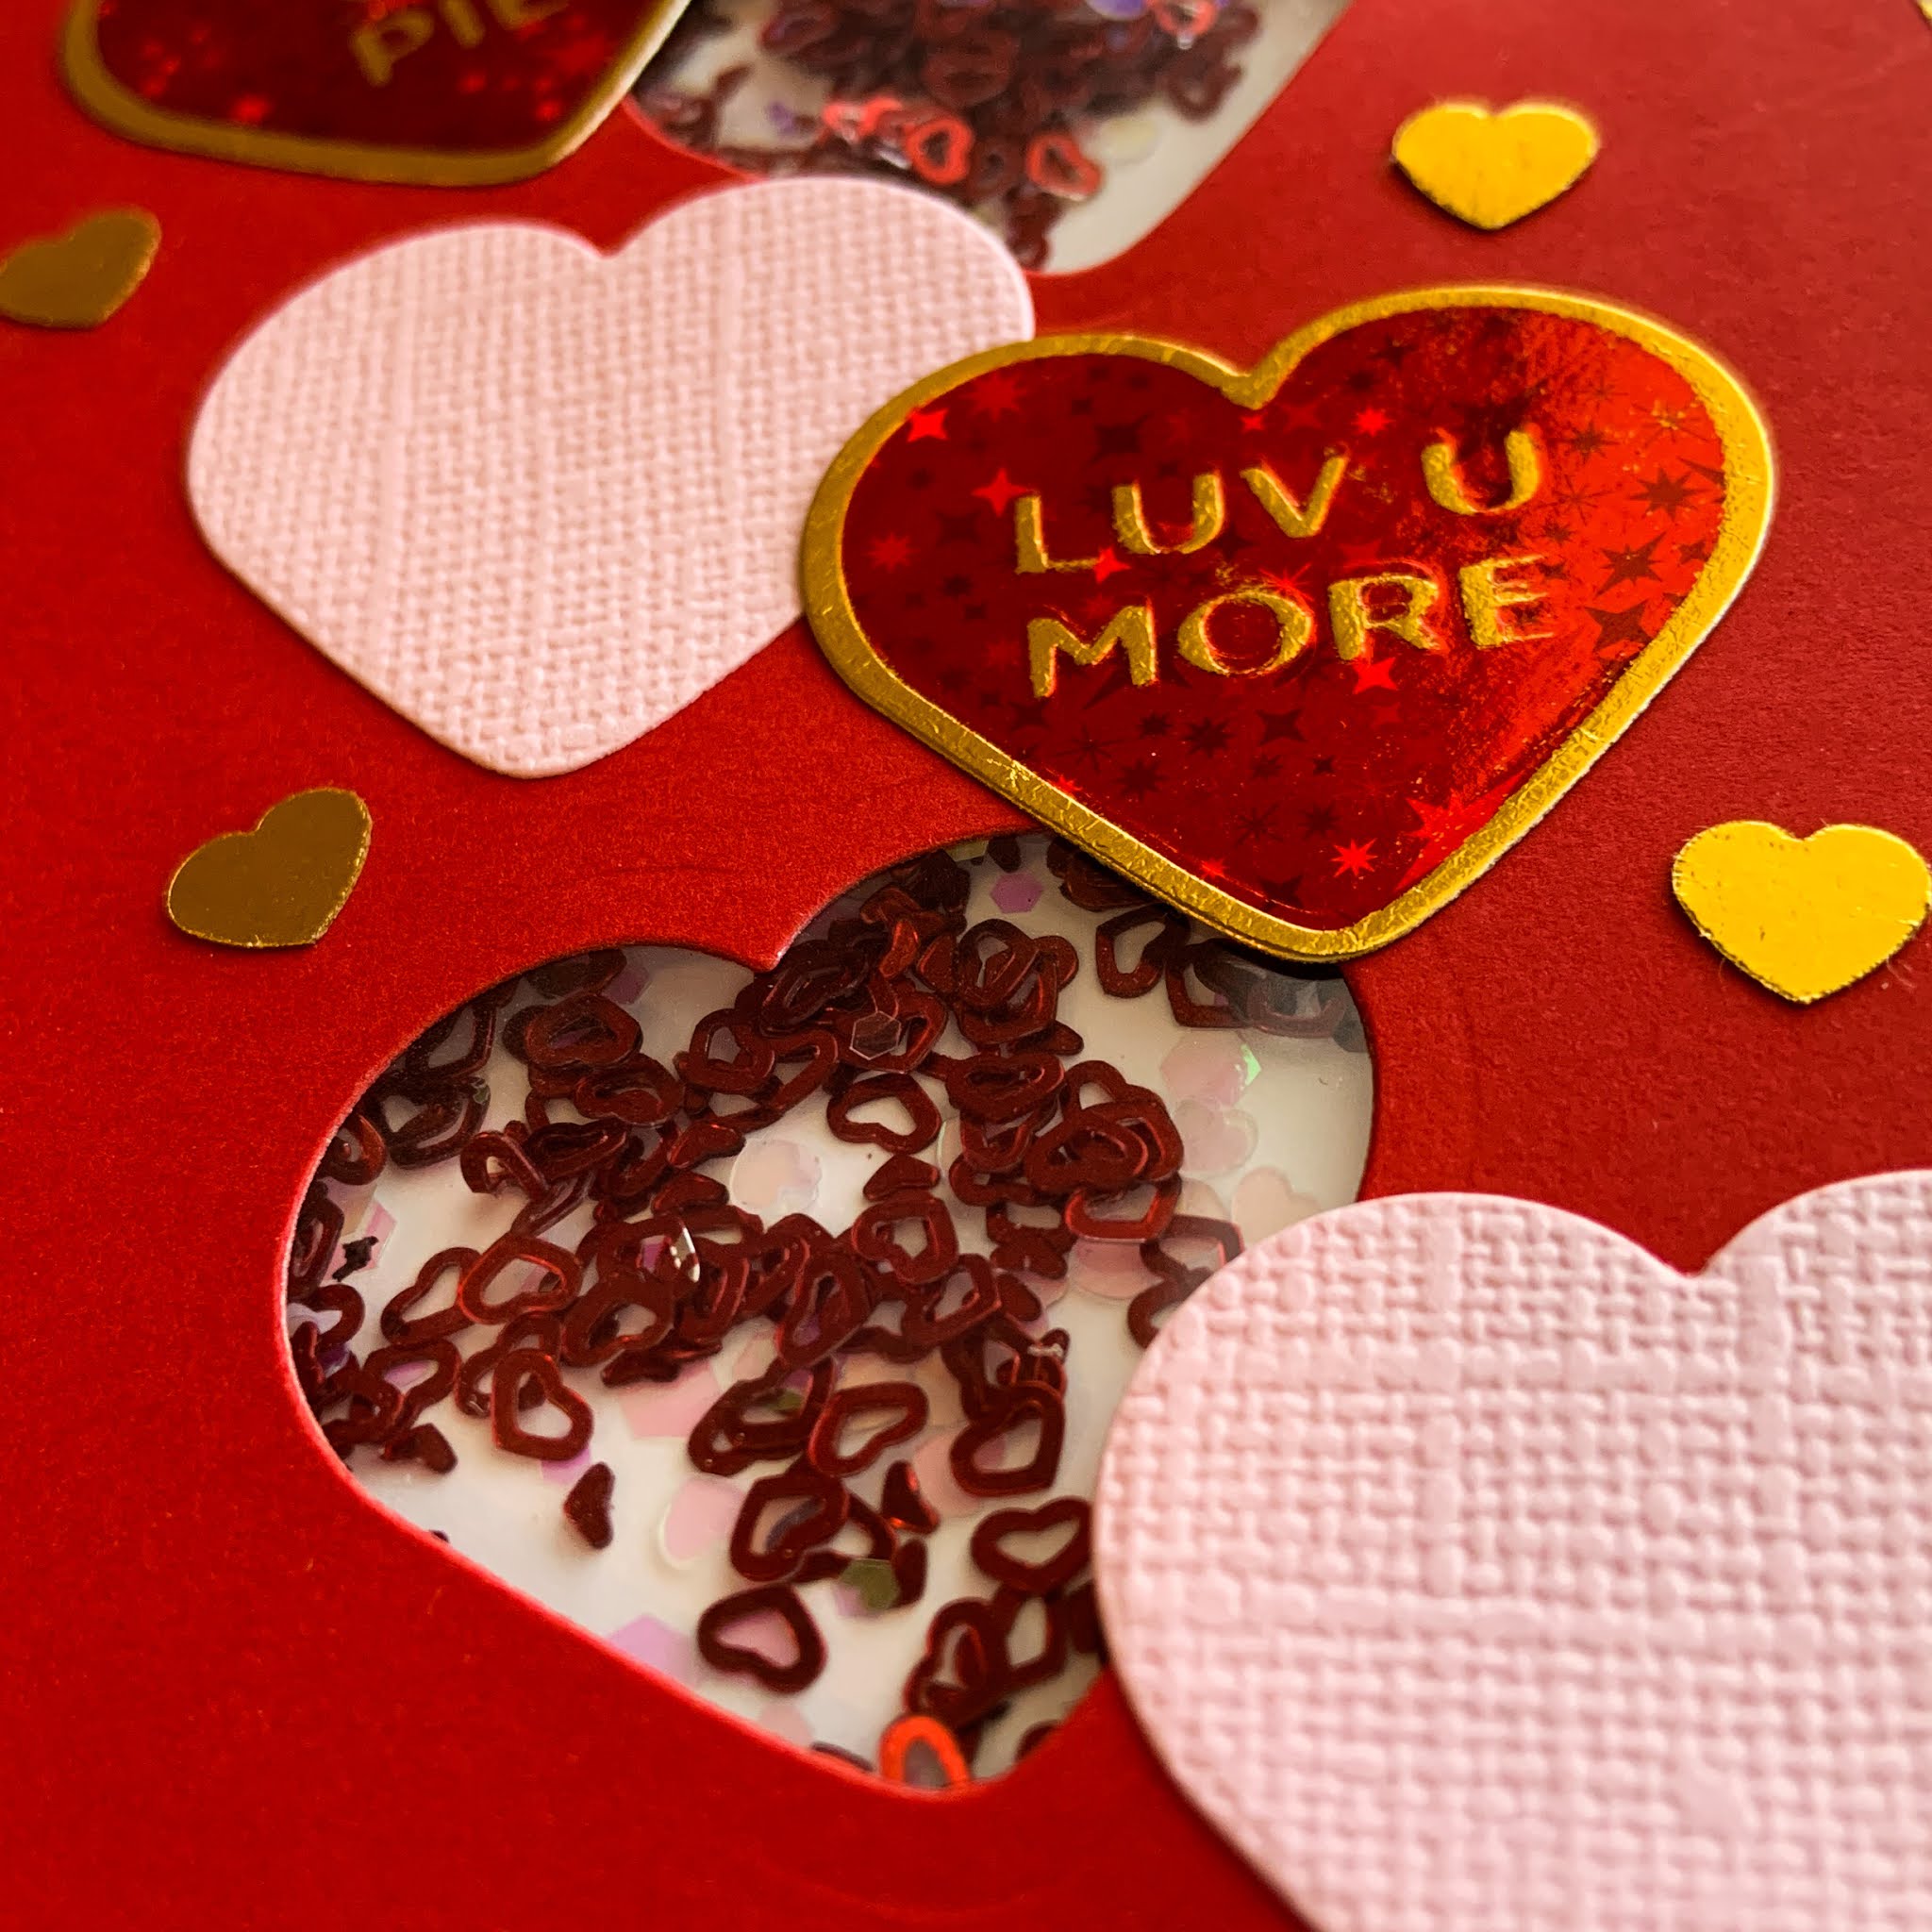
I used a variety of Spellbinders Glimmer foils to foil the Glimmer Plates onto heavy white cardstock as well as gold foil cardstock. I took the heart die included in the Snarky Hearts Glimmer Plate set and cut out two hearts from a red and pink card base. I glued a piece of acetate to the back of the card bases and placed foam tape all around the back of the bases.  I folded two white A2 sized card panels and sprinkled assorted Valentine glitters on the white card panels in the areas where I cut the hearts from the card bases.  I adhered the card bases to the card panels to create the two shaker cards.


On the front of each card panel, I cascaded hearts down the card, alternating a conversation heart with a solid heart.  I embellished the pink card with small red glitter heart stickers.  I embellished the red card by punching out small gold foil hearts and gluing them to the front of the card.


The final touch was to add a strip of white and gold striped washi tape going down both the left and right sides of the card.

Such an easy and beautiful Valentine card!


Luv U More
Supplies:
  • Accent Opaque White Cardstock 100lb
  • Recollections Cardstock - White, Red, and Gold Foil
  • Spellbinders Snarky Hearts Glimmer Plates
  • Spellbinders Glimmer Foil - Rose Gold, Polished Brass, and Crimson Stars
  • Acetate
  • Foam Tape
  • Assorted Valentine Glitter Set from Michaels
  • Valentine Paper Craft Red/Pink Glitter Stickers from Hobby Lobby
  • Small Heart Punch
  • Recollections White and Gold Striped Washi Tape

Comments

Popular posts from this blog

Ready Player One

Today's card is a fun virtual reality birthday card created in Cricut Design Space and features a vibrant title backed by an alcohol inked panel. A couple of years ago, my son and I read the book Ready Player One,  a science fiction book about humanity's use of virtual reality to escape the real world. Fast forward a few years and now he wants his own virtual reality headset for his birthday.  I created this card for him to celebrate our love for this book and to serve as a precursor of the birthday gift that was to come. While creating this card, I wore the movie T-Shirt I bought last year so I could mimic the movie title font and colors.  I needed an easy way to make the title out of rainbow colors so I placed a few colors of alcohol ink on a felt pad and swiped it across Yupo Paper.  I downloaded and installed the font used for the movie title and cut the title out of a black A2 card panel using Cricut Design Space.  I backed the black card panel with th...

Hero Arts Citrus Cards

Today I had fun playing with the Hero Arts Fresh Citrus Bold Prints background stamp and the Hero Arts Zest Wishes Stamp Set to create these fun and fresh set of cards. I started by creating the backgrounds.  I used white cardstock and stamped it with the background stamp using VersaMark Ink.  I heat embossed the panels with white embossing powder.  Then, I used a foam blending tool and blended Scattered Straw, Squeezed Lemonade, and Twisted Citron Tim Holtz Distress Oxide Inks to ink the card panels.  For some panels, I used only one ink and other panels I used a combination of all the inks.  I cut the inked backgrounds down to 4" x 5.25" and matte each panel on a black card base.   For one card, I used the excess strips from when I cut down the inked panels, and adhered these strips to a black card panel, leaving a little of the black background showing in between each of the strips. I stamped all the citrus fruits, leaves, flowers, and branches on w...

I'd Cross the Ocean For You

I just received the Seas the Day stamp set by Dare 2B Artzy and I couldn't wait to use the images and sentiments to make some ocean-themed cards.   I started out by stamping the manatee and shells and colored them with Copic markers.  For the card front, I used Pixie Spray on the back of a mermaid scales stencil and adhered it to a piece of Bristol smooth cardstock.  I blended 3 colors of blue Distress Oxide Inks to make it look like the ocean water was getting lighter near the surface.  To add a little bit of sparkle to the water, I splattered some glitter ink on the stenciled card front. I decided to make this a shaker card, so I used a scallop square die to cut a window out of the center of the card front.  A piece of acetate was glued to the back of this window.  I blended Tumbled Glass Distress Oxide Ink on the white card base.  A sequence mixture was made using blue, white, and iridescent sequence.  I glued a few of the sequence pieces ...