
Ride the Wave

For today's card, I made a beach scene using the Hero Arts Beach Heroscape stamp set.  I used a variety of different inks to create this scene.


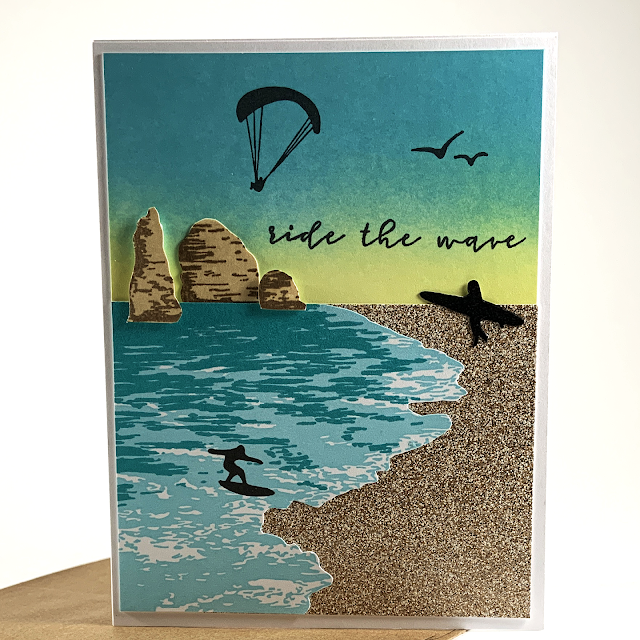
I started out by stamping the first layer of the water using Ocean ink by Close to My Heart.  The top layer was inked using It's A Boy ink by Catherine Pooler.  I used VersaFine ink to stamp the surfer within the water.  I used Antique Linen Distress Ink for the base of the rocks and stamped the top layer in Walnut Stain Distress Ink.  I fussy cut around the water and rocks.


I used Distress Oxide inks to create the sky.  I started by blending Broken China to the top of a white card base.  I blended a little bit of Squeezed Lemonade underneath Broken China to give the effect of a sunset.  I used VersaFine ink to stamp the sentiment, sea gulls, and parasailer in the sky.


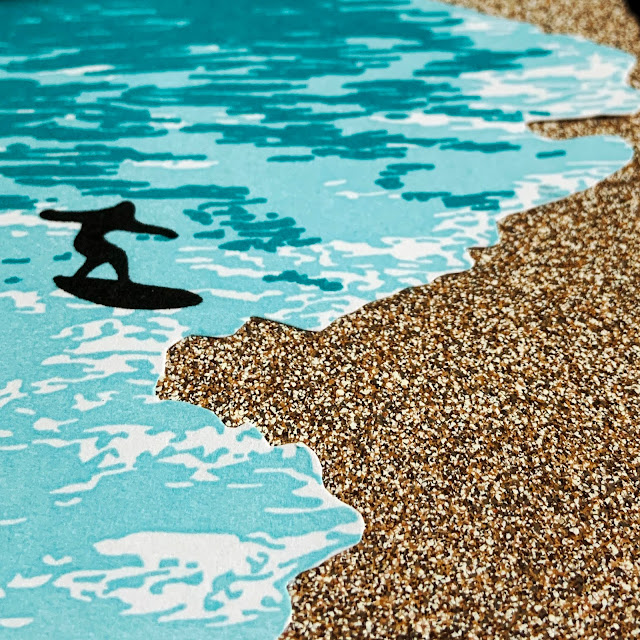
To create the sand, I swiped VersaMark ink on white cardstock and embossed it with Stamp On It Powder Keg Desert Sand Embossing Powder.  I adhered the wave to the left of the sand-embossed paper.  I also stamped the larger surfer using VersaMark ink in order to heat emboss the surfer with black embossing powder.  I wanted this surfer to have a glossy appearance to match the gloss of the sand embossing powder.


To assemble the card, I adhered the water piece to the ink blended card base. I arranged the three sea stacks near the top of the water, putting two of them just within the water.  I used a small strip of foam adhesive to pop these two sea stacks off the page.  I adhered the larger surfer just underneath the sentiment. To finish the card, I glued the scene to a white card base, leaving a small white border around the scene.

I experimented with other color combinations to create the sky, rocks, and water.  I also experimented with heat embossing the elements in the sky and the surfer in the water, but the embossing caused a loss of details in the images.  I also experimented with using Stazon Ink to stamp on top of the sand embossed glossy panel.  Here is a photo of one of these experiments.


It was fun to create the scene and experiment with a variety of different inks.

Ride the Wave
Supplies:
  • Accent Opaque White Cardstock 100lb
  • Hero Arts Beach Heroscape Stamp Set
  • Close to My Heart Ink - Ocean
  • Catherine Pooler Ink - It's A Boy
  • Distress Oxide Ink - Squeezed Lemonade and Broken China
  • Distress Ink - Antique Linen and Walnut Stain
  • VersaMark Ink
  • VersaFine Ink
  • Jet Black StaZon Ink
  • Recollections Ebony Embossing Powder
  • Stamp On It Powder Keg Desert Sand Embossing Powder
  • Darice Adhesive Foam Strips

Comments

Popular posts from this blog

Tim Holtz Spencer Halloween Card

I can't get enough of Tim Holtz's Colorize Spencer die set.  The detail and dimension of this image is absolutely amazing.  Today's card features Spencer, 3-D embossing folders, and a few other Tim Holtz Halloween dies sets. The main card panel was made by embossing a piece of silver foil cardstock using the Sizzix 3-D Textured Impressions Pinwheel embossing folder.  I watered down a few drops of black acrylic paint and used a paint brush to brush the paint onto the embossed panel.  I let the paint dry for about a minute and then took a paper towel to rub off the excess paint.  I adhered this panel to a black card base. The smaller card panel was made by embossing a piece of black cardstock with the Tim Holtz Sizzix 3-D Texture Fades Mini Cobblestone embossing folder.  I added a few drops of Sterling Distress Foundry Wax to a craft mat and used my finger to apply the Foundry Wax to the embossed panel.  I added a black matte behind this emboss...

Hello Spring 2022

I love making spring cards.  I get so excited to mix and match the many die sets I have accumulated throughout the year.  Today's cards feature die cut shapes from a variety of die sets.  I created both a vertical and horizontal card layout, changing out the focal image on each of the cards. I started by cutting one of the Sizzix Creative Background dies from the side of a white card panel.  I trimmed a little off each edge and layered it onto a pink cardstock panel.  I cut some grass from light green cardstock using the the grass die from the Spellbinders March 2021 Large Die of the Month Set.  Using the same die set, I cut the sentiment "Hello Spring" from lavender cardstock. You can't have a spring card without lots of flowers, so I scavenged through my scraps of paper to find colors that would coordinate well together.  I used multiple Sizzix Thinlits die sets to cut flowers, foliage, and branches from the scraps of colored cardstock.  I also ...

#HAILTHESAIL

Today's layout was inspired by Day 1of @christys_beautiful_life 30 Days of Sketches Series 8.  Today's triangular sketch was created by Laura Whitaker.  The Scraptember challenge for this sketch was stitching.   As soon as I saw the triangle on this layout, I knew I wanted to use a sailboat to document my daughter's new student orientation day at her college by the sea.  I used my Cricut machine to cut a large sailboat out of a piece of blue whitewashed cardstock.  After losing a time-consuming battle with my sewing machine, I was able to get some blue stitches around the edges of the sailboat.  I glued the sailboat to the blue star paper from Vicki Boutin's Color Study collection.   I used the blue and white striped paper from the Color Study collection to create the large banner.  I inked the edges of the banner with Black Soot Distress ink.  I matte the banner with a small strip of the black script paper from the 6x8 paper p...