
First Day of School

Today's layout was inspired by @christys_beautiful_life 30 Days of Sketches Round 8, Day 3.  I decided to focus the layout on a photo of this year's first day of school.


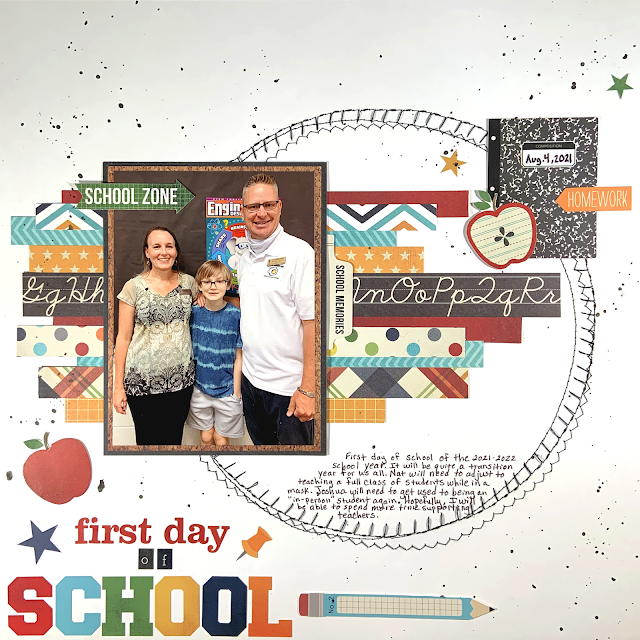
The layout has several sketched circles.  I decided to break out the sewing machine and sew a few black circles using a variety of stitches.  


The Scraptember challenge combined with this sketch was layering. So I grabbed the Simple Stories Smarty Pants collection and layered up a bunch of the branding strips and the patterned papers found on the journaling cards.


I used the letter stickers from the collection to create the title.  I also used some of the stickers to embellish the title and photo, and also to create an embellishment cluster in the upper right corner of the layout.  To finish off the layout, I splattered it with black ink.


I love the 30 Days of Sketches because it is a great way to use up older collections and challenges me to utilize techniques that I don't often use in my layouts.

First Day of School
Supplies:
  • 12x12 White Cardstock
  • Black Thread
  • Simple Stories Smarty Pants Collection
  • Ranger Dylusions Ink Spray - Black Marble

Comments

Popular posts from this blog

Ready Player One

Today's card is a fun virtual reality birthday card created in Cricut Design Space and features a vibrant title backed by an alcohol inked panel. A couple of years ago, my son and I read the book Ready Player One,  a science fiction book about humanity's use of virtual reality to escape the real world. Fast forward a few years and now he wants his own virtual reality headset for his birthday.  I created this card for him to celebrate our love for this book and to serve as a precursor of the birthday gift that was to come. While creating this card, I wore the movie T-Shirt I bought last year so I could mimic the movie title font and colors.  I needed an easy way to make the title out of rainbow colors so I placed a few colors of alcohol ink on a felt pad and swiped it across Yupo Paper.  I downloaded and installed the font used for the movie title and cut the title out of a black A2 card panel using Cricut Design Space.  I backed the black card panel with th...

Glimmer Hot Foil Birthday Cards

Today's cards are part of my stash-busting series.  This is where I look around my craft room and grab a bunch of supplies that I haven't yet had the chance to use.  The results yielded two glimmer hot foiled birthday cards. I used the smooshing technique to apply Mustard Seed and Worn Lipstick Distress Oxide inks onto white card panels.  After the panels were dry, I used the Spellbinders Glimmer Hot Foil System along with the Scattered Flowers and Diamonetta Background Glimmer plates to add Aura Glimmer Hot foil to the card panels.   The card panels were mounted onto pink cardstock.  I used the same Aura foil to glimmer the Happy Birthday sentiment onto white cardstock.   I cut the sentiment using a Momenta nesting border die.  I used a slightly larger border die to cut a sentiment border from the pink cardstock.  I cut pink and yellow flowers using the Sizzix Spring Things die set.  I ran the flowers and sentiment border through t...

Spellbinders Club Kit Valentine's Day Cards

Today's cards feature the Spellbinders January Small Die of the Month and the Glimmer Hot Foil Club Kits.  I couldn't wait to combine these two kits to create some Valentine cards. I used the dies from the Small Die of the Month kit to cut several pieces from pink and white cardstock as well as red and gold foil cardstock.  I used the Glimmer Hot Foil sentiment glimmer plates to glimmer several sentiments in red and gold foil onto white cardstock.  For each card, I glued the decorative frame to a white card base.  I added the smaller die cut panel to the decorative frame. For the shaker cards, I die cut the large frame out of white cardstock and trimmed off the decorative edges.  I adhered one of the smaller foil die-cut panels to this piece.  I trimmed down the edges some more leaving a small border around the inner panel.  I used the included heart die-cut to cut out a heart from the center of this white cardstock panel just inside the heart that was...